
Step 1 – Collecting Required Details
Valid login details are required to send emails using SMTP. Therefore, you need to gather the following information to set up SMTP on WordPress:
- SMTP Host. Name of the outgoing mail server.
- Type of Encryption.
None/SSL/TSL. - SMTP Port. Port used to transmit outbound mail to mail server.
- SMTP Authentication.
Yes/No. In most cases this option should be enabled. - SMTP Username. Username used to login to mail server.
- SMTP Password. Password used to login to mail server.
Step 2 – Installing and Configuring WordPress SMTP Plugin
Unfortunately, WordPress doesn’t have an inbuilt tool to send emails via SMTP. Therefore, you will have to use a plugin for this. We recommend using Easy WP SMTP plugin as it’s free and easy to use. Follow these steps in order to install and configure Easy WP SMTP plugin.
- First of all, you need to install the plugin. Step by step guide how to install WordPress plugins can be found here.
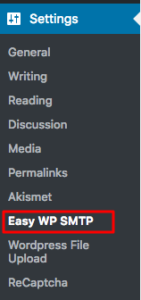
- Navigate to Easy WP SMTP Settings page which is located under Settings section.
- In General Settings page you need to enter general information and SMTP details from Step 1.
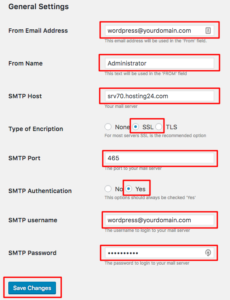
- From Email Address. The email address used in the
Fromfield. Some hosting providers may not allow using external email address there. Therefore, it’s recommended to use the same email address as for SMTP username. - From Name. Text used in the
Fromfield. You can keep it simple, for example, Administrator. - SMTP Host. Name of the outgoing mail server.
- Type of Encryption. Usually it’s SSL.
- SMTP Port. Port used to transmit outbound mail to mail server. In most cases it’s
465or587. - SMTP Authentication. This option should be enabled.
- SMTP Username. The username you use to login to email account / mail server.
- SMTP Password. Password you use to login to email account / mail server.
Press Save Changes button once you are ready.
- From Email Address. The email address used in the
- Easy WP SMTP has Testing And Debugging Settings section. It can be used to check SMTP details and send a test email. Fill To, Subject, Message fields and press Send Test Email button.
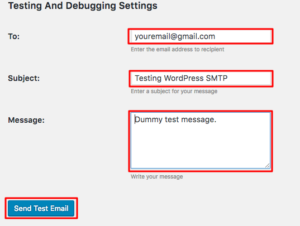
- If everything is configured correctly, you will see a green success message at the top of the page.

That’s it, you have successfully installed and configured SMTP plugin. Now all email notifications will be sent using SMTP instead of PHP Mail. If you run into any kind of trouble or get errors, contact your hosting support team.
Conclusion
Although SMTP is a better option to send emails, WordPress doesn’t have an inbuilt SMTP feature. By finishing this tutorial you have learned how to install and set up WordPress SMTP plugin. Now all WordPress emails are sent using SMTP protocol and there is less chance for emails to end up in the spam / junk folder.