Log in to your Zoho Mail account to enable POP access. (Login to www.zoho.com/mail >> Settings >> Mail Accounts >> POP >> Enable POP Access by clicking the checkbox).
Launch the Microsoft Outlook application in your system.
Click File and select Add Account.
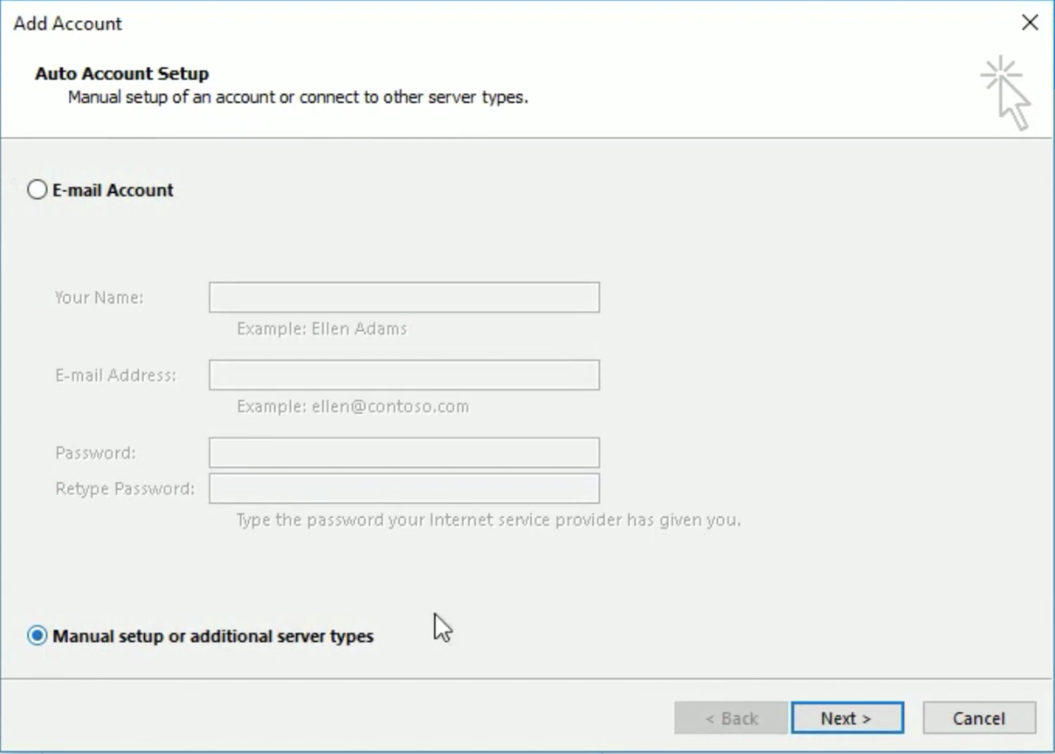
Locate and select ‘Manual setup or additional server types’, and click Next
In the ‘Choose Service’ page, select ‘POP or IMAP’, and click Next.
In the ‘Add Account‘ page, provide the following details:
User Information
Your name: Your preferred display name. This will be used in the emails you send from Outlook.
Email address: Your Zoho account email address (user@domain.com or email aliases for organization accounts or username@zoho.com, if you have a personal account)
Server Information: For specific configuration related to your account, check this section.
Select POP3 from the Account Type menu.
Incoming server:poppro.zoho.com – for organization accounts (if your domain is hosted with Zoho).
Outgoing Server:smtp.zoho.com
Logon Information:
Username – The email address of your Zoho account (user@yourdomain.com for Email Hosting users / username@zoho.com for personal users).
Password – Zoho Account Password (Use Application-specific Password if Two-Factor Authentication is enabled for your account.)
Ensure that ‘Remember Password’ ischecked, and click More Settings.
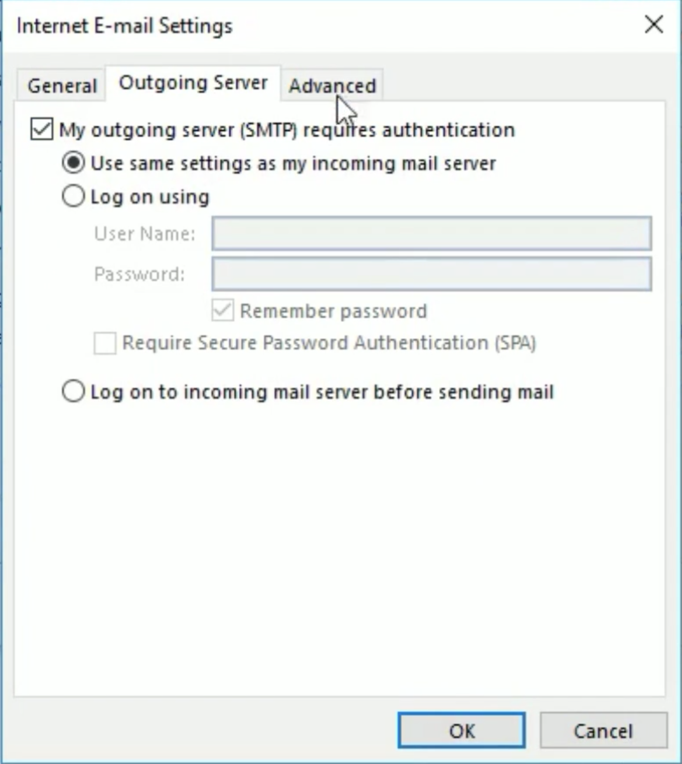
Outgoing Server tab: Select My outgoing server (SMTP) requires authentication and ensure that Use same settings as my incoming server is checked.
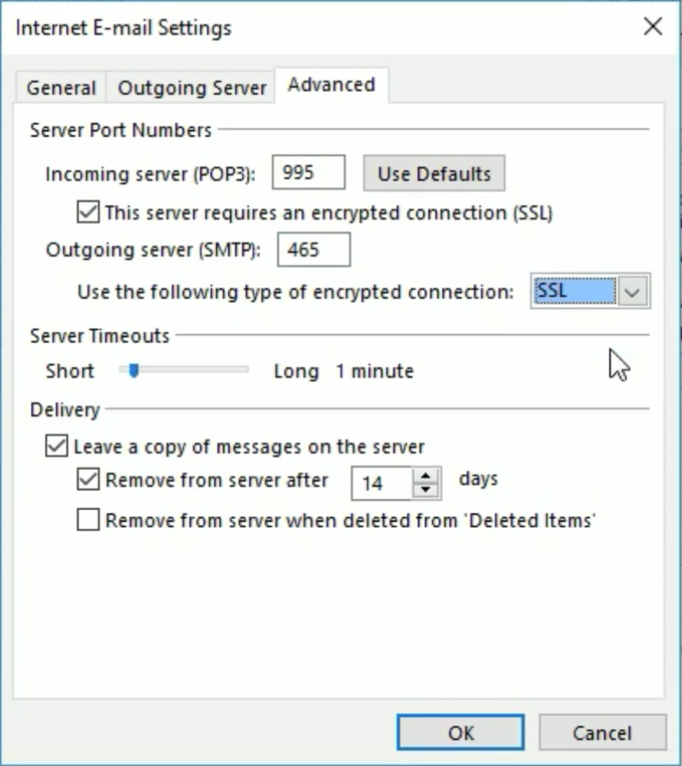
Select the Advanced tab and configure the Settings as follows:
Incoming Server (POP3): 995
Select the This server requires an encrypted connection (SSL) checkbox.
Outgoing Server (SMTP): 465
In Outgoing Server, Select SSL from the drop down for the encrypted connection.
Click OK
You will be redirected back to the ‘Add New Email Account’ section.
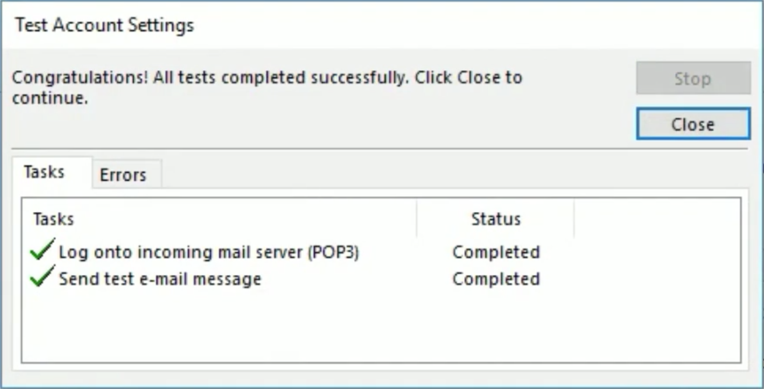
Click Test Account Settings to check the configuration info.
When the tests are successful, Outlook will display a popup as shown below.
Click Close. If you see any errors, check the troubleshooting section.